News
Site Editor
 Site
https://leonetworkgroup.usa18.wondercdn.com/uploads/image/5fe152faa587d.png
They often permit the vertical installation of equipment so that it is flush with the wall and looks excellent even in public locations. But how challenging is it to mount a network cabinet on the wall?
How to Install a Wall-Mouthed Network Cabinet
Views: 1722
Author: Site Editor
Publish Time: 2022-11-28
Origin: Site
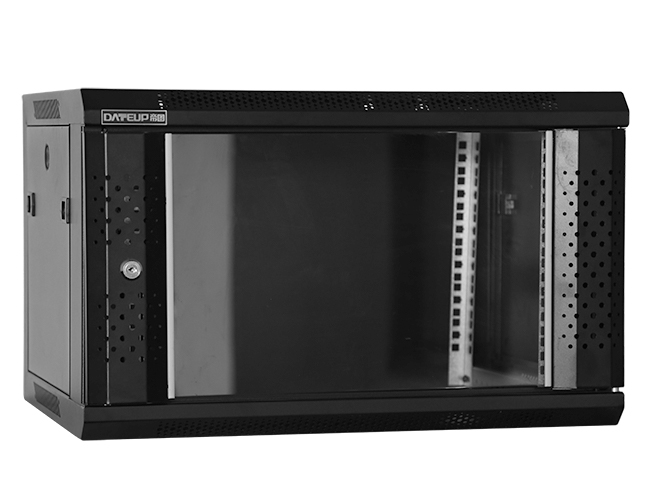
If you have limited workspace and less demanding computing requirements, a wall-mounted network cabinet is an excellent choice.
They often permit the vertical installation of equipment so that it is flush with the wall and looks excellent even in public locations. But how challenging is it to mount a network cabinet on the wall?
The extra step in the process is determining just how much weight your wall can hold. It's then as simple as mounting a TV set (and then racking IT equipment on it).
Where is The Best Place to Mount?
Some wall-mounted network cabinets are broader than 16 inches to accommodate two studs. Although you will lose weight capacity, a wall-mounted network cabinet may also be mounted to drywall.
A simple 4U wall mount, for instance, may use the provided bolts to support up to 105 pounds on drywall. The capacity is raised to 200 lbs by having it expertly placed on studs.
In general, mounting on studs is recommended whenever possible. Even if the drywall functions, if there is an earthquake or anything knocks against the mount, drywall won't hold up as well as studs.
How much weight your studs can support will vary based on where they are positioned and the fasteners you are using, so there isn't a single, definitive answer to this issue. It is advised that you get individual, qualified guidance for jobs where you will be wall mounting a lot of fragile equipment.

What Kind of Fasteners Should Be Used For a Wall-Mounted Network Cabinet?
Wall mounting kits frequently come with drywall anchors, sometimes known as fasteners. These are often made with broad threads that, in order to retain a firm grip, lock into several locations in your drywall. If your kit doesn't include fasteners and you want to place your cabinet on drywall, be sure you understand the weight of the load you will be placing. To ensure that your drywall anchors are rated appropriately for your needs, keep in mind that certain drywall anchors are more effective than others. They will also create a deeper hole in your wall the more weight they can support. Because of this, you shouldn't feel pressured to choose the wall anchor with the largest weight capability if you don't actually need it.
How to Set Up Networking Equipment.
It should be simple to rest the rail or chassis ears on the mounting rails and apply screws if your equipment will be wall mounted vertically. There is no requirement for thorough disassembly when replacing equipment because this may be done while the mount is already mounted to the wall.
The majority of wall mounts include rails with square holes for attaching your equipment. As a result, you will additionally want cage nuts that fit your rail or chassis ears.
To attach equipment, cage nuts are inserted into the square holes before a screw is put through. Networking equipment may be placed by its ears without rails since it is often lightweight. If at all feasible, it is still advised to employ rails, as they secure the equipment better.
How to Install Servers
You will want either rails or L brackets to mount a server. When installed, the ears on a server chassis are not designed to hold the weight of your server. They are usually used to lock the server into place.
Two post server rails are necessary for wall installations that only have front mounting rails. Make sure to shop carefully because many 2 post rails are installed in the middle. You need 2 post rails that are front mounted. You will require a 4 post server rail if your wall mount has four mounting rails or posts.
These are preferable for bigger equipment, including full-sized servers, because they have four points of support when mounted.
The process of installation is the same for standing racks and wall-mounted network cabinets:
1. Before mounting, the inner rails must be fastened to the server. Shoulder screws are used to do this.
2. Shoulder screws are located on the server chassis's sidewalls and fit into j openings or keyhole openings on the outside rail.
3. The cage nuts that are installed in your wall-mounted network cabinet are threaded to the outside rail.
4. The inner rails will glide into them and latch into position while still being linked to the wall mount.
Purchase the perfect wall-mount network cabinet for your project
Need a network cabinet? Consider our wall-mounted cabinets. Wall-mounted cabinets and server racks are a flexible option that saves money and space.
For those little, vacant spots in your office, they are ideal! For more information or details to assist you select the best wall-mounted cabinet, click here.
If you want to know more about industrial network cabinet,china fiber optic splice closure,china fiber optic distribution box,please consult the fiber optic splice closure factory


