News
Site Editor
 Site
https://leonetworkgroup.usa18.wondercdn.com/uploads/image/5fe152faa587d.png
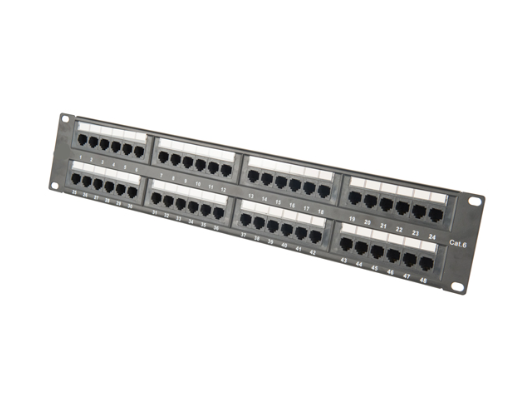
A network patch panel is a device that connects all the network cables from various rooms or locations to the central network hub or switch. The patch panel helps to organize different cables and makes it easier to manage network connections. Wiring a network patch panel is not a difficult task, but it requires some basic knowledge of networking concepts and wiring techniques. In this article, we
How To Wire A Network Patch Panel
Views: 416
Author: Site Editor
Publish Time: 2023-07-13
Origin: Site
A network patch panel is a device that connects all the network cables from various rooms or locations to the central network hub or switch. The patch panel helps to organize different cables and makes it easier to manage network connections. Wiring a network patch panel is not a difficult task, but it requires some basic knowledge of networking concepts and wiring techniques. In this article, we will discuss the steps involved in wiring a network patch panel.
Step 1: Choose the Right Patch Panel
The first step in wiring a network patch panel is to choose the right patch panel. There are different types of patch panels available in the market, and you need to choose one that suits your requirements. The patch panel should be compatible with the network switch or hub and should have enough ports to accommodate all the network cables that need to be connected.
Step 2: Plan the Cable Layout
Before starting the wiring process, plan the cable layout. Identify the location of each cable and decide on the cable routing. You can group cables by room, floor, or by function. It is also essential to label each cable to ensure easy identification.
Step 3: Prepare the Cables
Next, you need to prepare the cables to be connected to the patch panel. Strip the outer insulation of each cable, and untangle them. Ensure that the cable ends are clean and free from any damage. You can also use a cable tester to check the continuity of each cable.
Step 4: Connect the Cables to the Patch Panel
Now, connect the cables to the patch panel. Each port on the patch panel will have two slots, one for the input cable and one for the output cable. Insert the cable ends into their respective slots and ensure a tight fit. Use a punch-down tool to secure the cables in place. Repeat the process for all the cables.
Step 5: Test the Patch Panel
Once all the cables are connected, it is time to test the patch panel. Use a cable tester to check the continuity and connectivity of each cable. You can also connect a device to each port and test the network connection. If there are any issues, you should troubleshoot and correct them.
Step 6: Label the Ports
Finally, label the ports on the patch panel. This will make it easy to identify which port corresponds to which cable. You can use a labeling tool or stickers to label each port.
In conclusion, wiring a network patch panel is a simple process that requires careful planning and preparation. By following the steps outlined above, you can easily wire a patch panel and ensure a well-organized and efficient network connection.
If you want to know more about industrial network cabinet,china fiber optic splice closure,china fiber optic distribution box,please consult the fiber optic splice closure factory


