News
Site Editor
 Site
https://leonetworkgroup.usa18.wondercdn.com/uploads/image/5fe152faa587d.png
When setting up a networking system in a building, one of the most important components is the patch panel. This is particularly true for larger networks where multiple devices need to be connected to each other or to a server. A patch panel organizes all the cabling in one location and provides an easy point for network technicians to access the cabling when troubleshooting or changing network co
Site
https://leonetworkgroup.usa18.wondercdn.com/uploads/image/5fe152faa587d.png
When setting up a networking system in a building, one of the most important components is the patch panel. This is particularly true for larger networks where multiple devices need to be connected to each other or to a server. A patch panel organizes all the cabling in one location and provides an easy point for network technicians to access the cabling when troubleshooting or changing network co
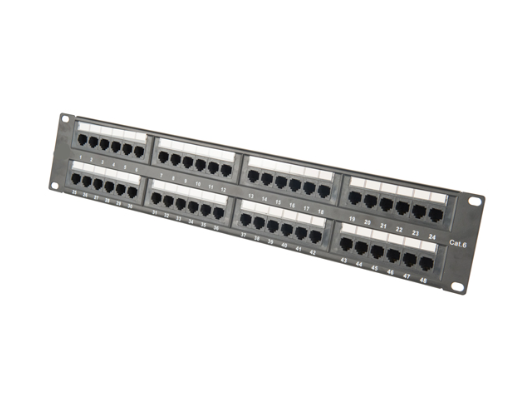
How To Wire Cat6 Patch Panel
Views: 929
Author: Site Editor
Publish Time: 2023-07-11
Origin: Site
When setting up a networking system in a building, one of the most important components is the patch panel. This is particularly true for larger networks where multiple devices need to be connected to each other or to a server. A patch panel organizes all the cabling in one location and provides an easy point for network technicians to access the cabling when troubleshooting or changing network connections. In this article, we will provide a step-by-step guide on how to wire a Cat6 patch panel.
Step 1: Prepare the patch panel
Before starting to wire a patch panel, it is important to first prepare the panel. This includes identifying the ports on the panel, and removing any protective covers or labels. It is also important to ensure that enough cable slack is provided for each port to make it easier to connect to individual devices.
Step 2: Prepare the cable
Next, it is time to prepare the Cat6 cable. Cut the cable to the desired length, leaving enough slack to reach from the patch panel to the device connections. Strip the cable cover back about two inches to reveal the eight individual wires within the cable. Arrange the wires in the correct order according to the T-568B standard for Ethernet cabling.
Step 3: Insert the wires into the panel
Once the wires are correctly organized, insert them into the panel. Ensure the wires are inserted into the correct ports on the panel. Push each wire in until it clicks into place. Repeat this process for each cable.
Step 4: Label the connections
Label the patch panel connections according to the device each cable will connect to. This will make it easier to identify specific connections if any troubleshooting or changes need to be made in the future.
Step 5: Test the connections
Finally, test the connections to ensure they are working correctly. Connect a device to each port, and test the network connection. If all connections are working correctly, the patch panel is now fully installed.
Conclusion
Wiring a Cat6 patch panel may seem like a daunting task, but by following these simple steps, it can be a straightforward process. Remember to organize the cables correctly, label each connection, and test the connections to ensure they are working correctly. By installing a patch panel, a networking system can be better organized and easier to manage.
If you want to know more about industrial network cabinet,china fiber optic splice closure,china fiber optic distribution box,please consult the fiber optic splice closure factory


